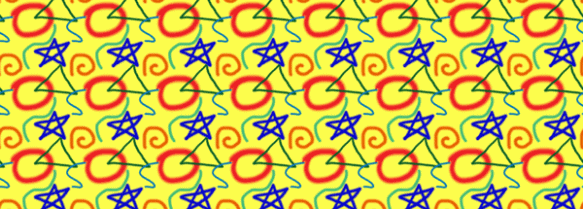
Painted Daisies, Take 2

I played around some more with my Painted Daisies design, done for the Fabric8 Contest at Spoonflower.  Here was the previous version.

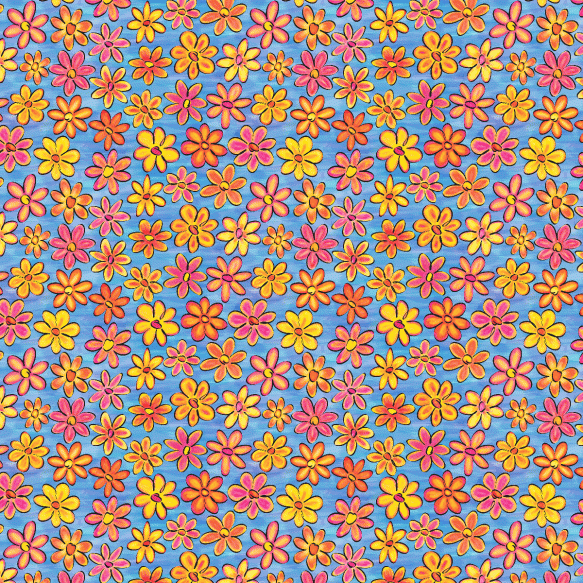
While I like the colors, the design seems boring.  I decided to try adding lots more layers of daisies to fill in all the spaces.  I made this first attempt by duplicating the layer and moving it–just to see if the idea might work. Continue reading

Painted Daisies, Take 1

Another week, another fabric design challenge…  Spoonflower and Robert Kaufman Fabrics are sponsoring the Fabric8 contest.  The challenge is to create a modern fabric design that evokes the style of pen & ink drawings colored with watercolor paints.  This isn’t my usual style, so I thought it would be a good challenge to tackle to stretch myself.

When I think of modern fabrics, I think of bright colors and bold styles–again, not exactly what I’d picture for pen and ink drawings colored with watercolors.  So, anyway, here’s my interpretation of the theme. Continue reading

Houndstooth Seamless Repeat in Photoshop — Another Digital Fabric Weave

In a previous post I talked about simulating the look of a Tartan plaid using Photoshop Elements.  The same technique can be used to create a digital version of other weave patterns.  I won’t go through all the steps which were covered in the earlier post, but the basic steps are:

  • create one unit of the repeating pattern (I do this using the rectangle tool in Photoshop)
  • define it as a pattern in Photoshop (Edit ==> Define Pattern)
  • use the pattern to fill another object with the repeating pattern (Edit ==> Fill)
  • select and change the colors as desired

Houndstooth is a popular pattern lately, and easy enough to create digitally. Continue reading

Urban Sunset — Making a Seamless Repeat in Photoshop

Recently Spoonflower and the Textile Center in Minneapolis, MN sponsored a design contest called Urban Sightings.  The aim was to design a fabric using, as inspiration, photos taken of the neighborhood around the Textile Center .

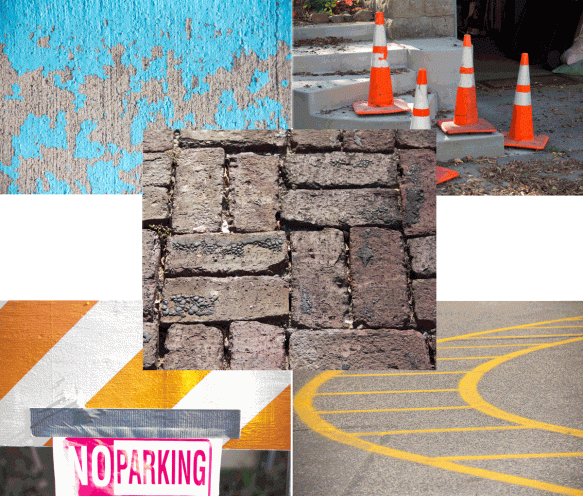
There were six photos, and I used the five below as my inspiration.

I used the photo of bricks to create a brush in Photoshop. Continue reading

Easy Digital Batiks

Traditional batik designs are created by placing hot wax patterns on fabric, and then dyeing the fabric.   The wax resists the dye and keeps the fabric beneath the wax the original color.  Dharma Trading has a colorful and fun explanation of creating batiks here.

The batik effect is easy to simulate in Photoshop, and the resulting image can be printed on fabric or used anywhere you need a seamless repeating pattern. Continue reading

Fabric Design — Gockoo’s Apple Crisp

One of Spoonflower’s recent weekly fabric design contests was to design a fabric using a recipe as part of the design.  I’m not much of a cook (my husband does most of the cooking, though I’ve mastered the NY Times No-Knead Bread), so I don’t have any go-to recipes.

As I thought about this contest, I remembered my grandmother’s hand-written cookbook from the 1930’s.  Gockoo (as we called her) wrote her recipes in a journal and added ones she found in newspapers or magazines, or ones she got from friends.  I found her recipe for apple crisp pudding and thought it would make a nice nostalgic print, especially since there were only a handful of ingredients in the recipe. Continue reading

Super Quick Plaid Patterns in Photoshop or Illustrator

In this earlier post I showed how to create a tartan plaid pattern in Photoshop.  That method simulates the weave characteristic of a real tartan plaid, with the distinct diagonal twill pattern, like the one shown here.

As an alternative, here’s a really quick way to create a seamless plaid in Photoshop Elements.  Continue reading

Creating Your Own Plaids in Photoshop Elements

A plaid, or Tartan, pattern consists of criss-crossing bands of different color threads in the lengthwise (warp) and crosswise (weft) orientations.   The distinctive diagonal lines in  plaids are created by weaving in a twill pattern.  To create a plaid effect in Photoshop Elements we need to be able to mimic the twill weaving pattern.  Continue reading

Making a Repeat Pattern Look Less Boxy – Photoshop Elements

If you’re designing a repeat pattern in Photoshop Elements, there’s an easy way to make it look less boxy.  The trick is to have design elements which overlap the edges of the tile.

I started with this simple tile.  Each of the design elements is in its own layer in Photoshop.  The tile creates this repeat pattern — there’s clear space between the tiles.

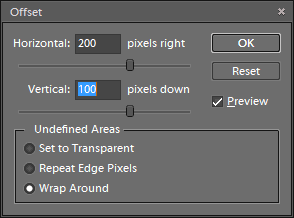
Since each element is in its own layer, I can use the offset command (from the menu:  Filter –>Other –> Offset) to independently move each element.  You can play around with the level of offset to move any element so that it wraps around the tile horizontally, vertically or both.  When you input an amount of offset, a positive number will move the element right or down, and a negative number will move it left or up.  The big benefit of using the offset command is that you can draw/edit an individual design element in its entirety, and then later split it up across the edges of the tile.

Here’s a quick update to the original tile where I moved some of the elements (and also changed the size of some elements).  And here’s the resulting repeat which looks less boxy.

A couple things to keep in mind when using this.  The offset command shifts the entire layer in Photoshop Elements, so it works best if your overall design is in multiple layers which you can shift independently.  Any editing you want to do to your design is much easier to do before using the offset command.  If you want to edit a design after offsetting it, you will usually need to undo the offset before making the edits.

Design is a plan for arranging elements in such a way as best to accomplish a particular purpose — Charles Eames

How to Create a Seamless Repeat in Photoshop Elements – Part 2

In part 1 I showed how to create a seamless repeat by editing the edges of a tile so that they line up properly when repeated.  There’s another useful way to disguise the edges, and that’s to add new images that go across the edges of the old tile.

1.  Here’s a simple example of this.  I’ll start with the tile below.

2.  Next is to”cut” the tile in half both horizontally and vertically and “paste” it back together.  This is done in Photoshop Elements using the Filter –>Other –> Offset command.  (See the previous post, step 3 for details of how to do this.)  Here’s the result.

3.  I could use the techniques from Part 1 of this tutorial to get the orange lines to meet at the edges so that the repeat would be seamless.  Alternatively, I could just cover up the orange lines with something that goes across the edges.  Here I drew a square to cover up the lines.

4.  Here’s what the two tiles look like in repeat.

Both techniques — fixing the edges and covering the edges — can be use to create a richer repeat pattern.  I’ll show this with the rooster image I created in Part 1 of the tutorial.  Here’s the repeat pattern after the edges were fixed.  The repeat is seamless, but there’s a lot of ‘blank’ background in the pattern.  I’ll fill this in with rooster and hen images from other photos.

1.  Start by opening another photo with an image you want to add to the pattern.  Here’s a second rooster photo, and I’m going to use the Quick Selection Tool to select only the rooster and not the background.
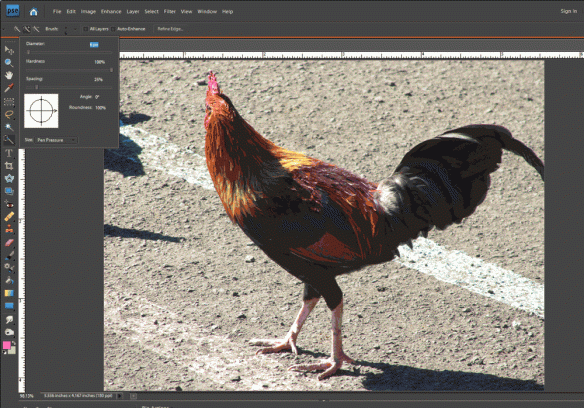
2.  After quickly selecting the rooster, here’s a screen shot where the dotted lines show the rough selection.  As highlighted by the purple arrows, there are some areas that need to be refined.
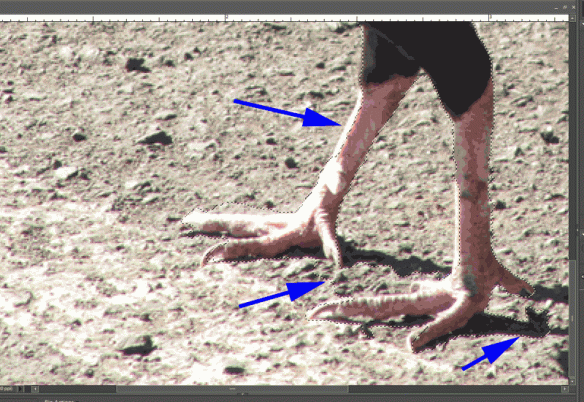
3.  Refine your selection until only the object you want to copy is selected.  The way to do this with the quick selection tool is to use the “Add to Selection”  and “Subtract from Selection” tools to nudge the selection line as needed (circled on the menu pictured to the right).  It can also be helpful to decrease the brush size when you’re trying to make fine adjustments to the selection.

4.  Once your selection is good, copy it to the clipboard using the Edit –>Copy menu command.

5.  Go to the file that has your original tile and use the Edit –>Paste command.  This will put your copied image into your file in its own layer, which is important so that you can move it around and change its size without changing the original tile.  Here’s a picture of the new rooster copied into the original image.

This would create the repeat pattern shown below.  Note how the second rooster image helps disguise the edges of the repeat tile.  (See Tutorial Part 1, step 6 for details of creating the repeat.)
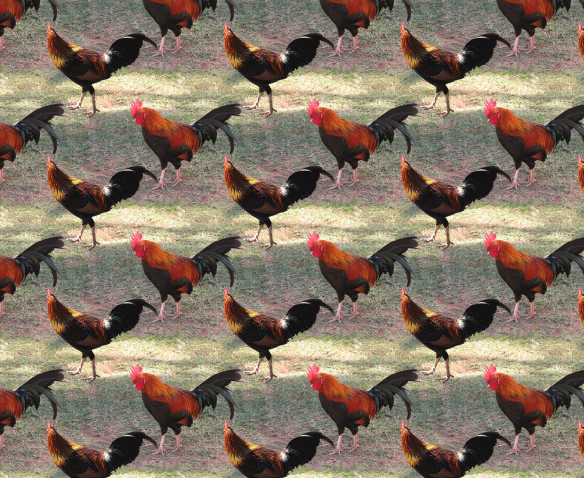
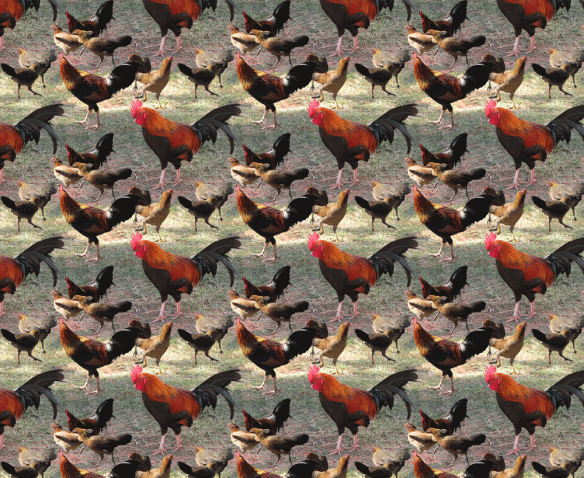
6.  If you want to add more images, repeat steps 1 through 5.  Move the new images around to get an arrangement you like.  Here’s a version with 4 added images of roosters and hens.
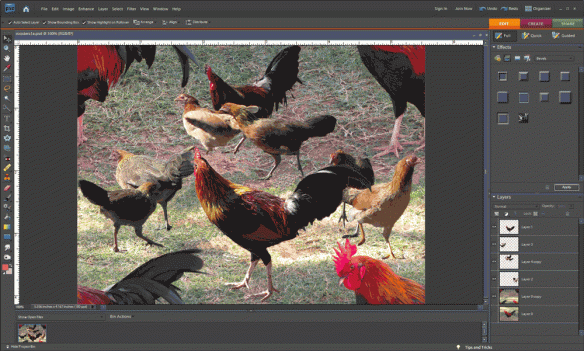
And here it is in repeat.  As Ludwig Mies van der Rohe said, sometimes less is more.