I’ve been learning to use Adobe Illustrator to create repeating designs for fabric (here’s an example, and another one). There’s a new version of Illustrator (CS6) which has a new feature allowing you to easily create repeat patterns. I’ve been wanting to try it, and as luck would have it, Spoonflower.com announced a contest to create an Arrow-themed fabric design using the new version of Illustrator. Perfect excuse to try it out, and I learned some important things about how the pattern function works in Illustrator. (You can see my final design here and vote for your favorites in the contest here.)
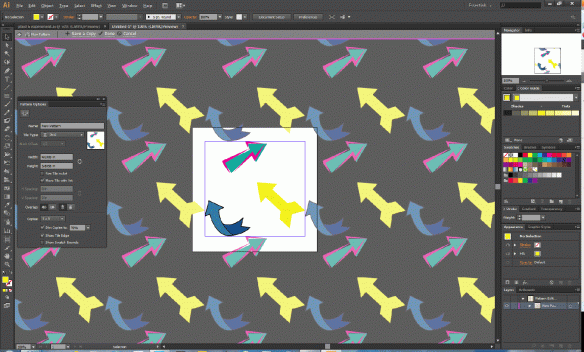
After downloading a trial version of Illustrator CS6, I started to play by creating a simple drawing with 3 arrows. Then, to create the repeat pattern, I selected all the objects and used the command Object ==> Pattern ==> Make. Illustrator adds the new pattern to the swatches panel and shows the repeat on the screen (below) with the copies dimmed so that the original pattern stands out–here’s a screen shot:
In this case, the blue curved arrow and the yellow arrow are much closer together than I’d have thought based on the original drawing. I was expecting the artboard (the large white square) would be used as the repeat size, but that’s not the case–the repeat is based on just the size of the selected objects (more on this later).
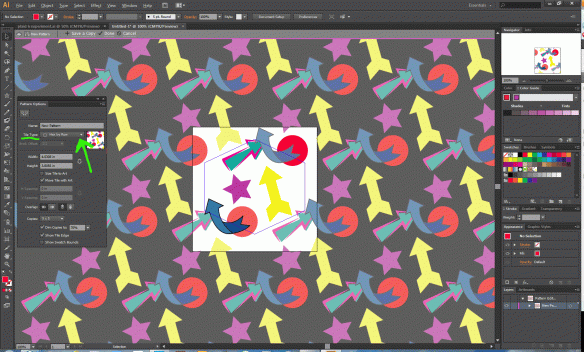
In this pattern mode, you can add/change/move objects and immediately see the impact on the repeat. This is a very handy new feature which will speed up pattern design. In my play example, I moved and rotated the yellow arrow, added a star and added a circle which went beyond the tile boundaries (shown by the blue square outline below), Here’s the result:
Playing with the repeat is quick and easy…you can change the size of the tile, the brick offset, or the tile type. Below is the tile changed to a Hex repeat which causes some overlaps due to the different type of repeat.
It’s easy to save a new repeat using the command Object ==> Pattern ==> Save a Copy. WARNING — BE SURE TO SAVE ALL PATTERNS you might want to use or edit in the future. When you save the file, only the original objects (in their original states) are saved to the artboard. All the changes you made in the pattern mode are ONLY saved in the patterns. This really freaked me out the first time I saved a file and saw all my work disappear. You can go back and edit a pattern by double-clicking on it in the swatches panel — this will bring up the pattern mode with all your elements in it.
After playing a bit with the new pattern function, I figured it  was time for the contest. I thought I’d try a plaid with some added arrows. The plaid was easy enough to create, using the technique from this post. However, since I was using the pattern function, I had to make sure the plaid tile was exactly the size I wanted for my repeat. In the earlier method for creating a plaid, I could ‘chop off’ any extra bits using the artboard, but that doesn’t seem to work with the new Pattern function.
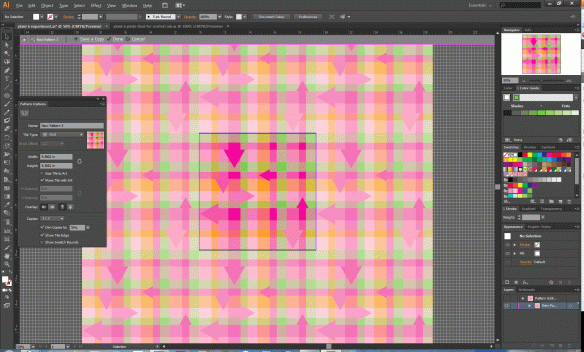
Once I was happy with the plaid tile I created a pattern and started adding the arrows. Initially, I kept all the arrows completely inside the tile, and here’s a view of it with the repeat on screen:
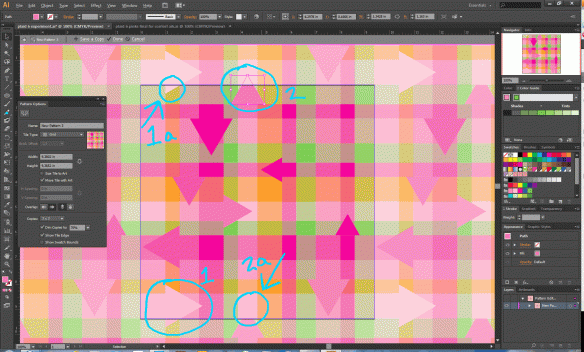
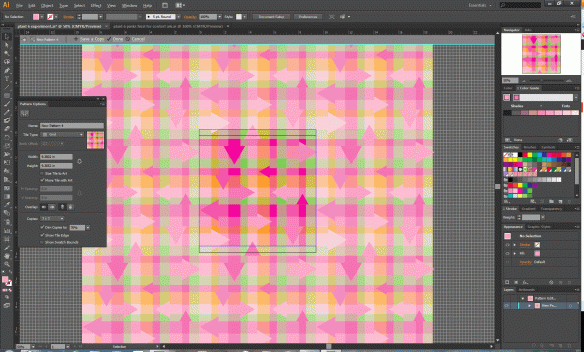
When I started adding arrows that crossed the tile boundaries, I ran into some weird issues with the overlap of the objects. In the picture below, when I added the light pink arrow (#1) it repeated at the top (#1a). But, when I added another arrow (#2), the repeat cut off the tip of the arrow (#2a) due to the way the Pattern function defines overlapping objects.
I searched the internet for a way around this problem and didn’t come up with any solutions. Finally, I moved the second triangle from the top of the tile to the position on the bottom of the tile, and the repeat worked. I was able to make this work for my design, but it was awkward needing to move objects to a different edge to get the proper repeat, and I’m not sure it would work for every design. Here’s the final version, shown in Illustrator:
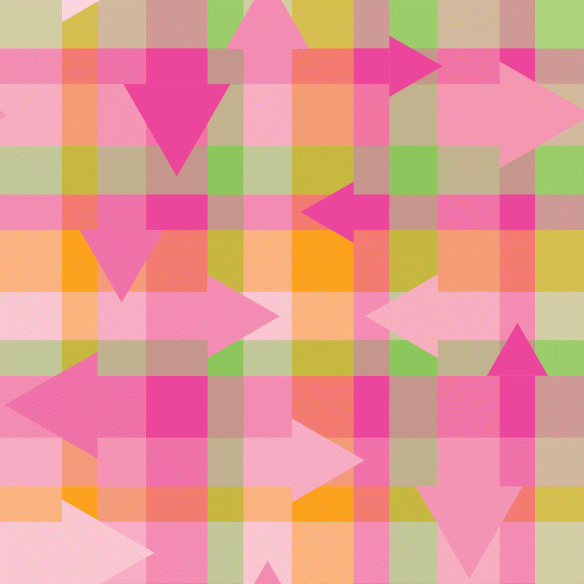
And here’s the individual repeat tile:
And here it is as a repeating fill:
Based on my quick experimentation here are my pros and cons.
Pros: super easy to create a simple repeating pattern; really quick to modify placement of elements in the design and see the impact; easy to change the size of the tile or the type of tile; easy to change the ‘brick’ repeat.
Cons: I’d like to be able to save all the elements to the original artboard rather than just saving them to the pattern; I think the overlap issue could cause problems with some designs.
I shot an arrow into the air, It fell to earth, I knew not where; For so swiftly it flew, the sight Could not follow it in its flight. I breathed a song into the air, It fell to earth, I knew not where; For, who has sight so keen and strong That it can follow the flight of song? Long, long afterward, in an oak I found the arrow, still unbroken; And the song, from beginning to end, I found again in the heart of a friend.
— Henry Wadsworth Longfellow



Thanks for this tutorial! I’ve been looking for info like this. So, how did you finally export or save your pattern tile for print? Would you recommend using this approach if you need to maintain ability to change colors for each element? Thanks so much for any info!
Hi Anita-
Thanks for your nice comments.
On your questions…when I did this design I was using a demo version of Illustrator CS6 and I no longer have access to that version. So, I don’t remember exactly how I exported the design for print, but here’s how I do it in version CS5. When I work on a design, I make sure that the Artboard in Illustrator is the exact size of my repeat pattern. To save the repeat, I use the command File ==> Export. I use a file type of PNG, and in the lower left corner of the export screen I click on the “Use Artboards” checkbox. This saves it as an image with the exact dimensions of the Artboard. You could save your file as another file type (such as JPG) as long and the “Use Artboards” is an option for that file type.
As for changing colors of a design, Illustrator makes it very easy. Select all the objects (or at least the ones you want to change colors), and then use the command Edit ==> Edit Colors ==> Recolor Artwork. This brings up a box with all your current colors and the option to assign a new color to any of the current colors. As you change a color, you’ll see the result in your design, so you can make adjustments as you go along.
Hope this helps.
Jean
Jean,
Thank you so much!!!
Anita
Jean,
Just wanted to say I tried your techniques and it all worked really well. THANKS AGAIN!