In earlier posts I’ve talked about doing seamless repeats in Photoshop. Making an Illustrator design into a seamless repeat is also quite straightforward. And, since Illustrator designs are vectors, they can be infinitely scaled without losing any detail.
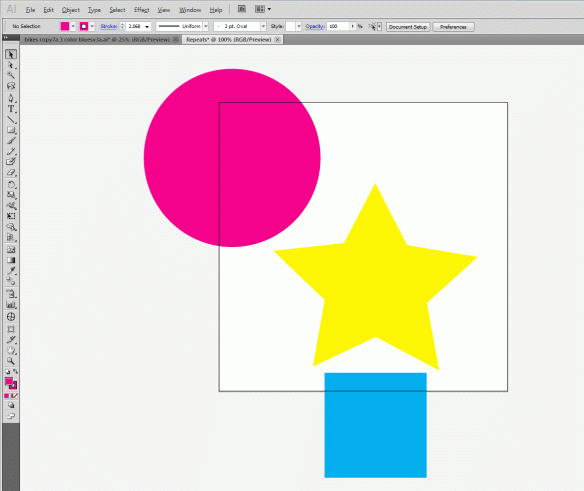
I’ll go through the steps using this really simple design. In the picture below, the artboard bounds are defined by the white square, and this will also be the bounds for the repeat design.
The pink circle and the blue square go outside the repeat bounds, so they need to be duplicated on the other side of the repeat. Precise placement of the duplicates is key to making the repeat seamless. Before moving any objects, make sure you know the exact size of your artboard.
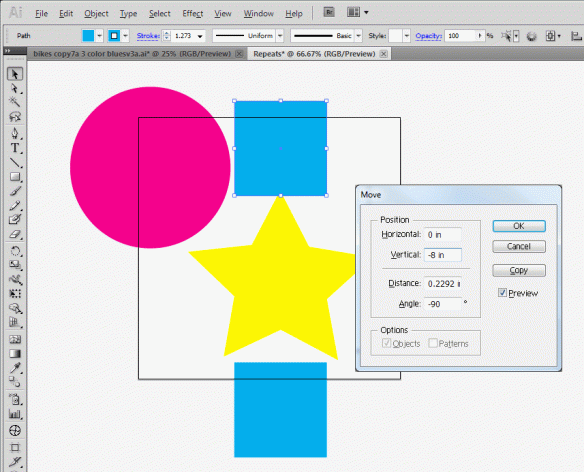
The blue square needs to be copied to the top of the repeat b ounds. To do this, select the blue square (with the selection tool). Copy the square (command Edit ==> Copy) and then paste it in place (command Edit ==> Paste in Place). This puts a new blue square exactly on top of the original.
To move the new blue square to the top of the artboard, use the command Object ==> Transform ==>Move. In the pop-up box, check the Preview option so you can see where it’s moving. In this example the artboard is 8 inches by 8 inches, so I put 0 in the horizontal box and -8 in the vertical box. This moves the copy of the blue square from the bottom to the top of the artboard, as shown below.
The pink circle extends both horizontally and vertically past the artboard, so we need to copy it in both directions. To copy it vertically, follow the steps above, but make the vertical move distance a positive 8 inches rather than -8. This puts a duplicate circle in the bottom left portion of the artboard.
To copy the circles horizontally, select both pink circles and do the copy and paste in place as above. In the move pop-up box, make the horizontal position 8 inches and the vertical position 0 inches. This results in a pink circle in each corner of the artboard.
x
With all the objects in place, the final step is to define the repeat. This takes a couple of steps. First, draw a rectangle the exact size of your artboard and line  it up exactly on top of the artboard. Then send the rectangle to the back (command: Object ==> Arrange ==> Send to Back), and change its fill and path to ‘none’. Select all the objects (Select ==> All) and then use the command Edit ==> Define Pattern. Name your pattern, and it will appear in the Swatches palette.
Now you can use your pattern as a fill for other designs, even as a fill for fonts.
Here’s the full design, with the black square designating the boundaries of the pattern.
And here it is in repeat.
x
This bicycle design. Look Ma, No Hands, is one I did for a recent contest on Spoonflower. The full design is below, with the black rectangle denoting the boundaries of the repeat.
Here it is in repeat:
Here it is used as a fill for another design.
And as a fill for a font:
x
Life is like a ten speed bicycle. Most of us have gears we never use.
— Charles M. Schulz, Creator of Peanuts
Nothing compares to the simple pleasure of a bike ride.
— John F. Kennedy, U.S. President


