
I’ve been working on a snowflake design for another Spoonflower contest. When I thought I was all done with it, I realized that it would look better as a half-brick repeat rather than a straight repeat. It took me a while to rework it into a half-brick repeat, so I thought I’d show the basic steps in this post, and then cover the details in another post.
A half-brick repeat is similar to a half-drop repeat which I covered in this post. The picture below shows the difference between a straight repeat (on the left) where the stars are lined up on top of each other, and a half-brick (on the right) where each row of stars is offset from the rows above and below.

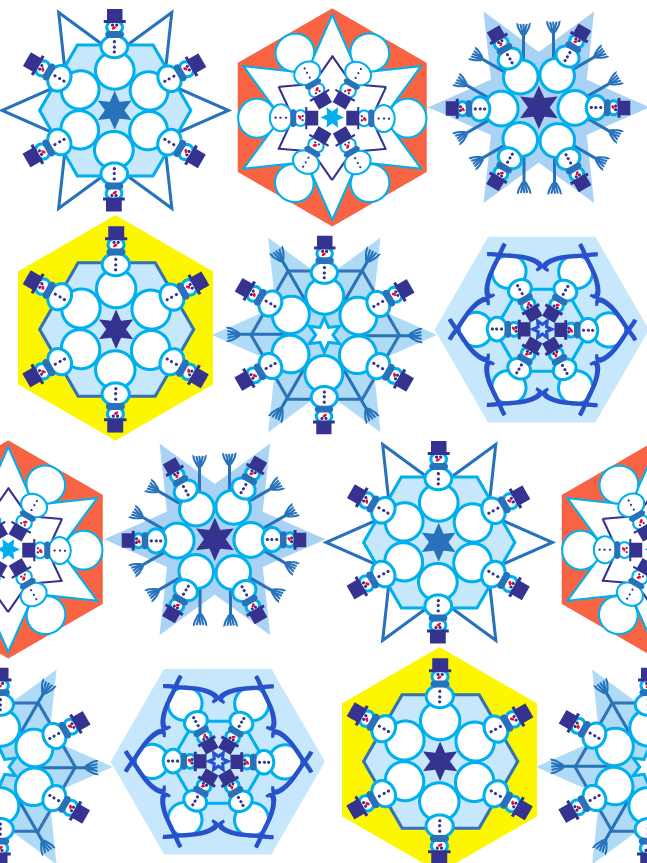
For my examples, I’ll use the 6 snowflakes shown below. I’ve colored one orange and one yellow so that it’s easier to see the repeats.

Here’s what this pattern looks like as a straight repeat. With this regular repeat there are columns and rows of repeating snowflakes.

To create a half-brick repeat, the first step is to double the height of the space for your design. (In Illustrator, change the Artboard size and in Photoshop change the Canvas size.) In this example, the original design was 9 inches wide by 6 inches high, so I changed the size to 9 inches wide by 12 inches high. Position your design at the top of the canvas/artboard so that the bottom half is empty.
The next step is to copy the design and then move to copy to the bottom, but offset to the right by half of the width.
The commands for Illustrator are:
- Select ==> All
- Edit ==> Copy
- Edit ==> Paste in Place
- Object ==> Transform ==> Move (in the Horizontal box put in half of the width of your Artboard, or 4.5 inches in my example, and in the Vertical box put in half the new height, or 6 inches in my example)
The steps in Photoshop are:
- Make a note of your image size in pixels (look at Image ==> Image size)
- Select ==> All
- Edit ==> Copy
- Edit ==> Paste Special ==> Paste in Place
- Filter ==> Other ==> Offset (in the Horizontal box put in half of the width of your image in pixels and in the Vertical box put in half the new height, and click on the “Wrap Around” option
This is what the design will look like after these steps in Illustrator. Note that the bottom left portion still needs to be filled in.

Below is what the design looks like in Photoshop after these steps. The pattern is complete (thanks to the ‘wrap around’ option).

For Illustrator, the previous steps need to be repeated, but this time the new copy needs to be moved to the bottom left portion. In the step “Object ==> Transform ==> Move”, put a negative sign in front of the horizontal position to move it left rather than right (-4.5 inches in my example). Here’s what it looks like in Illustrator after this step.

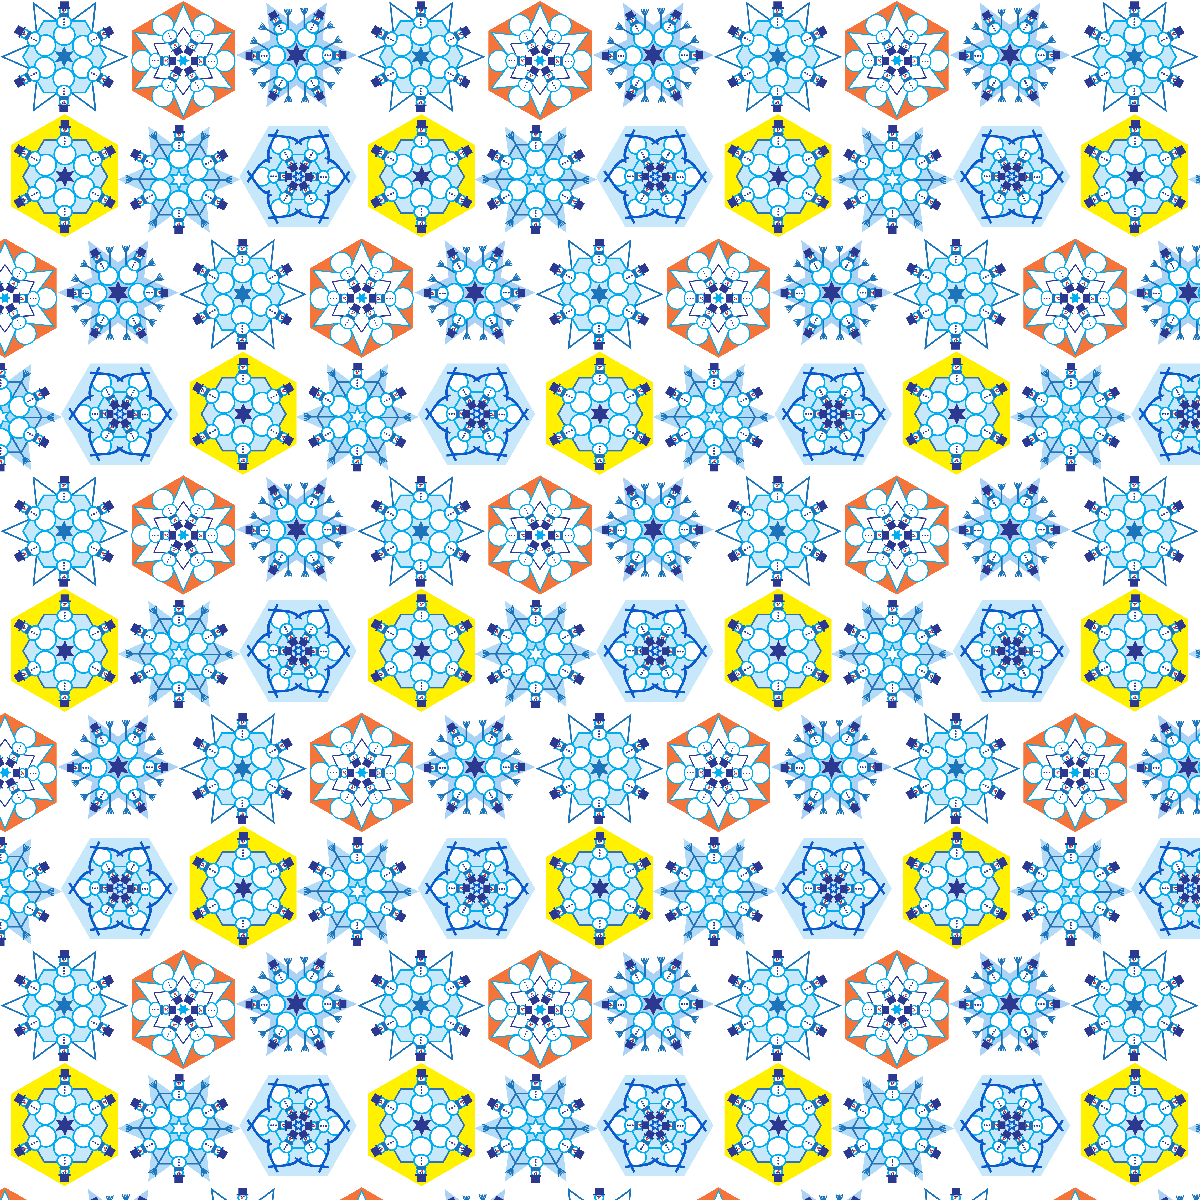
Now that the designs are complete, use the command Edit ==> Define Pattern in either Photoshop or Illustrator to make the repeat pattern.
Here is one repeat unit.
And here it is in repeat. Note how the yellow snowflakes are staggered rather than in vertical columns.
Nature is full of genius, full of the divinity; so that not a snowflake escapes its fashioning hand.
–Henry David Thoreau
No snowflake in an avalanche ever feels responsible.
— Voltaire

This is great, thanks so much for the tutorial!
This is just what I needed to know, thanks!!